Dahlias #2 - Growing/Care
Growing Dahlias Truly is relatively easy, but like so many things in life, not always perfect. Basic growing requires a tuber with a visible eye (where the sprout will start). The tuber is a clone of the parent plant. Always look for an eye on the head of the tuber - no eye - means no growth, and check the health of a the tuber any soft spots indicate rot for instance.
It is advantageous to ‘wake up’ your tubers in early Spring, after Winter storage. This involves placing your tubers in an area around 65 F (18 C), and waiting a bit to see eyes and possibly shoots. Just bear in mind that not all tubers wake up at the same time, like early, mid, and late bloomers. So this process can take a couple of weeks or even a month or more.
Dahlia tubers do not develop roots right away, they shoot a sprout first, then develop roots. This is why planting is not done when very wet (rainy) , or rain is forecast, and do not water immediately upon planting. There are no roots to readily absorb moisture and your Tubers could rot! It is easy to overwater tubers so until green growth appears above the soil line, don’t water. If your soil is dry, then moisten it a couple days before you plant (not soaking). Temperature of the soil is the other major determinant. The soil temperature should be at least 50 F at 6” below the surface (planting depth).
Dahlia Tubers come in all shapes and sizes, so a healthy tuber (no visible rot) and a visible eye is all you need to get going. Dig a hole the length of the tuber, about 4-6” deep and place the tuber in the hole horizontally with the eye facing toward the sky. If the soil temperature in the hole is lower than 50 F (early in Spring) then the tuber sprouting will be delayed. Mulching soil is always a good plan for regulating soil temperature, erosion, and weed control, just be careful if purchasing straw as a mulch - it must not be grown with herbicides or insecticides of any kind!
I have also noticed that by moving my dahlias to an area of slight shade in late afternoon has helped. They are heat loving plants only to a point. In intense heat and humidity they can shut down and go dormant.I have found that blooms start later in the season as a result of the excessive heat in July and early August in the last 5 years, in my climate zone 5b.
As the leafy growth increases, and your plants have 2-3 sets of leaves (12-18” tall), you will want to Pinch out the main stem inorder to increase the number of lateral shoots and blooms, and also increase the bushiness of the plants. When you pinch out at early stages of growth there is less damage to the mature hollow stems (water damage or bugs looking for a home in the stem).
Disbudding on the other hand is the removal of the two side buds (always in three’s) which diverts the plant’s energy into one the one main bud. That can keep someone busy almost all day in a dahlia field!
Another tip to keep in mind when you are cutting stems for flowers, you want as long a stem as you can get. I cut deeply into the plant, and it freaks some out when they see how far I will go. When I started I didn’t do that, and quickly learned! The great thing that happens, is that the plant will try to reach the same height or more with the subsequent stems.
It is important to ‘deadhead ‘ your spent blooms. Deadheading signals to the plant to keep producing blooms and tubers. If blooms are left on a plant it signals the plant to produce seed heads and not any more tubers.
A very important practice is to DISINFECT your clippers before moving to another plant when trimming blooms or dividing tubers. I use a 10% bleach solution in a jar, to disinfect my clippers when I am trimming/deadheading. The reason for this, is that various insects (hard to see) can easily carry viruses to your dahlias from surrounding area’s plants. These viruses get into the plants circulatory system from bugs piercing leaves and stems or by your undisinfected clippers cutting a stem or leaves and entering the circulatory system (eventually tubers too). Not all viruses are visibly damaging to plants but many are and can wreak havoc with a large variety of plants in your garden (Dahlias #5 Blog Post).
A simple soil test before planting is a great idea. The soil test will tell you is certain necessary elements are present or not. Better to understand what is missing before you act. Two main types of fertilizers, Organic and Synthetic. Organic fertilizers would be organic matter like leaves, compost and manure, fish emulsion, worm casings, and blood meal, for longer term benefits. Synthetic (General) fertilizers represent an immediate compensation for lack of a given nutrient, but they do not aid in the longer term fertility of the soil.
General Purpose fertilizers have three main nutrient levels N - Nitrogen, P - Phorphorus, K - Potassium (N - P - K on Fertilizer labels). Since Dahlias like about twice as much Phosphorus and Potassium (flower production) as Nitrogen (green growth - great for lawns), the desired fertilizer is a tomato fertilizer like a 5-10-10. If you don’t do the soil test you could be harming the plants by adding too much of the wrong nutrient and killing beneficial soil organisms. But your soil just needs to have a nice tilth and good drainage.
Watering is critical once growth above ground really gets going. If you are able to deeply water once a week (especially in evening or very early morning) that is best practice.
The advantage of growing dahlias (and other flowers) a littler tighter than you read about, is that they will fill out and crowd out weeds beneath their canopy. I use a 12” spacing in rows for this reason. Remove the lower leaves for improved airflow later in growing season.
A myth about dahlias is that, you need to wait for a killing frost before you dig them up in fall - NOT TRUE"!! Keep track of your planting date, and note the date you first see shoots above ground. The day you see shoots above ground count out 120 days, and that is your earliest dig date. In my climate zone, getting to take on this task during nice weather is a true blessing. I often get a hard frost one night in September but not a killing frost. If it is early the dahlias can recover (assuming a killing frost is much later) and keep blooming, but the number and quality of blooms diminishes as the light levels do. I now enjoy my mornings digging and then let them dry out on the soil, turned upside down so water can drain from the stem. I am not in a mad rush to beat bad weather anymore.
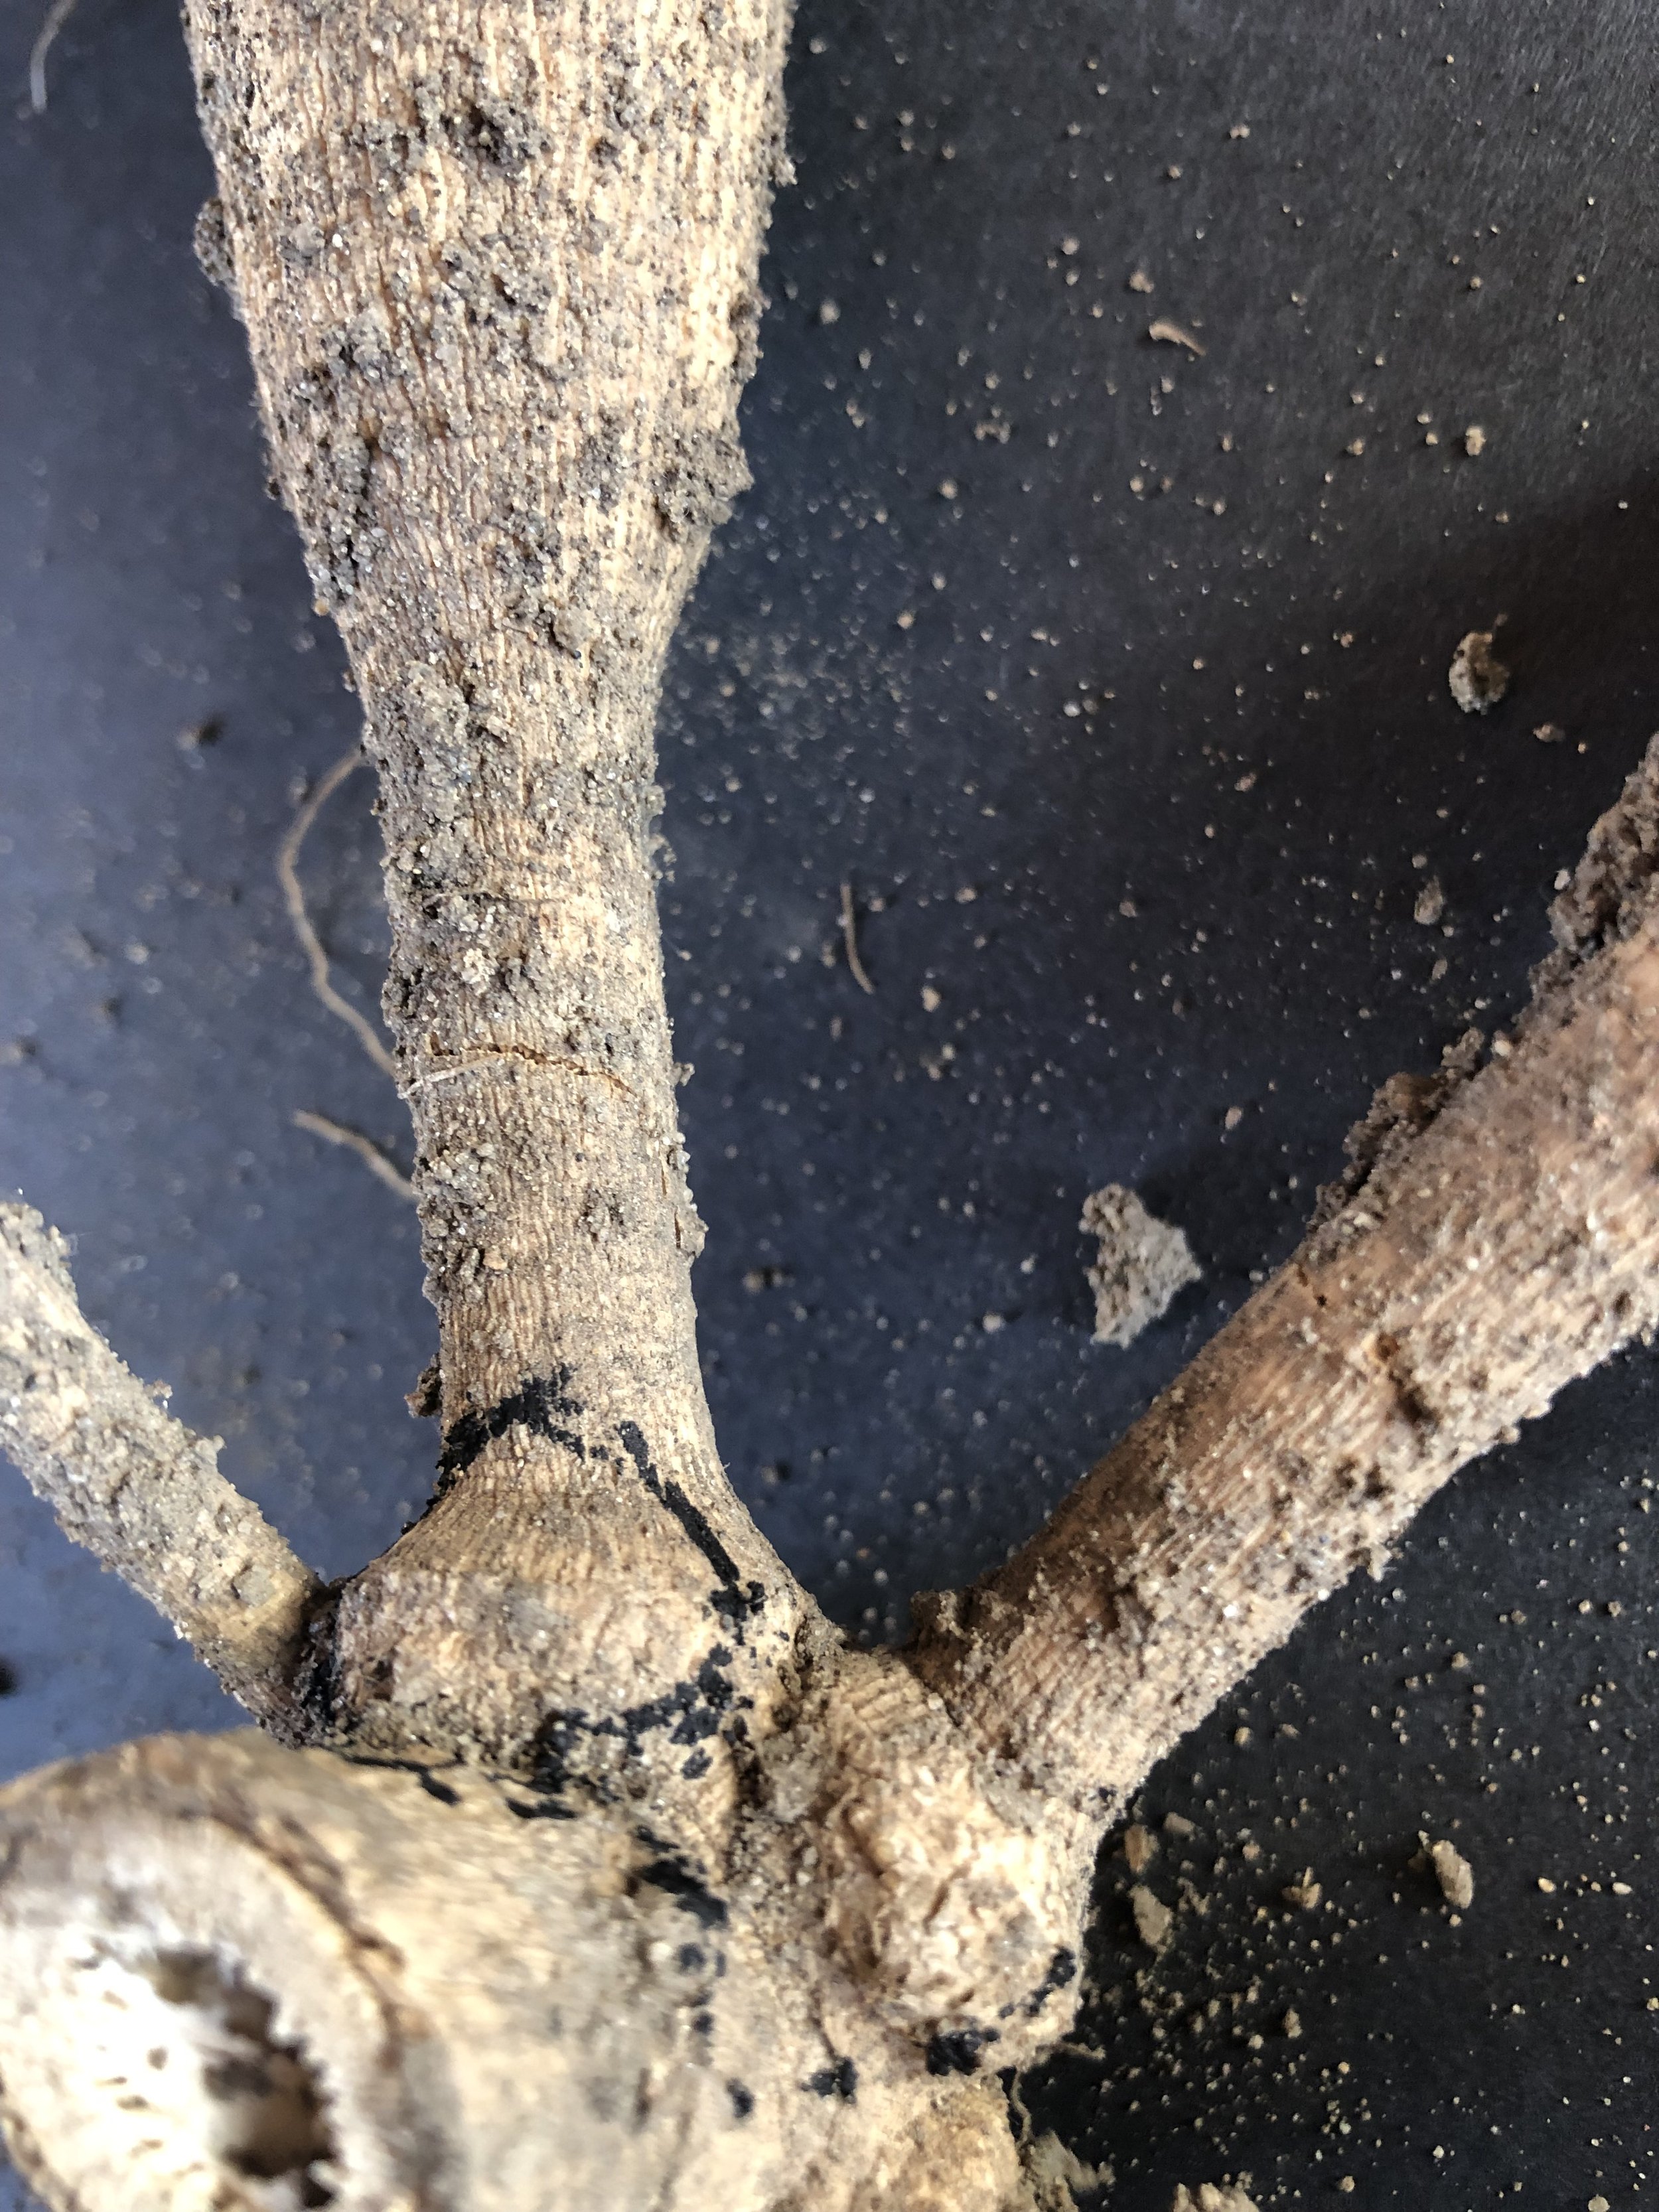
Additionally, remember that when you are digging out your tubers the eyes are easily visible for a week or two and then they recede into the heads of the tubers. It is for this reason that some people do all their dividing as the clumps come out of the field. I read a suggestion to take a black marker and circle the eyes for later winter dividing. Some growers like to store their tubers not in full clumps. I store them with some dirt still on them, in full clumps, in old tulip or lily crates. The differences in storage methods are usually predetermined by the dividing plan. But I find that the soil left on the clumps seems to help prevent drying out of the tubers. Ones that are dryer had no soil on them. The soil is messy when dividing, but the whole process of digging and storage is sped up at a particularly busy time of year, and dividing can take place when not so busy.
Methods of storage and dividing times vary due to location and personal preference. I can only suggest you find process works best for you given the the quantity of tubers you are processing. Remember too not all tubers store well or the same way, despite your best efforts. You will have some losses. Some varieties are workhorses in the garden and produce massive numbers of blooms and tubers. others not so much! These variations are varietal differences and usually create the “Unicorn” Dahlias. They don’t produce many tubers and do not store well! Honestly, their beauty sometimes isn’t worth the work, unless you are set up to keep cuttings going all year. Now that is another topic for Dahlias #3.